Strategically place mock cameras for deterrence in wireless hidden camera networks. Integrate realistic decoys with suitable camera models tailored to indoor/outdoor use. Map layout and coverage area using tools while considering space dynamics. Secure connections and fine-tune camera settings for optimal performance. Implement mock placement, test regularly, optimize signal and hardware as needed.
“Uncover the power of a wireless hidden camera network for enhanced security. This comprehensive guide navigates you through setting up an effective system, focusing on strategic mock camera placement to deter potential threats. From understanding placement principles to choosing robust cameras and planning network layout, each step ensures optimal coverage. Learn how to configure connections, fine-tune settings, and test performance for a deterrence-focused security solution that keeps your space protected.”
- Understand Mock Camera Placement Principles
- Choose Suitable Wireless Hidden Cameras
- Plan Network Layout and Coverage Area
- Configure Camera Connections and Settings
- Test and Optimize Network Performance for Deterrence
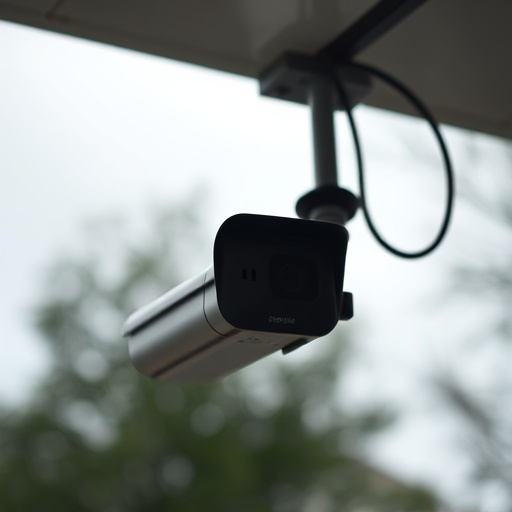
Understand Mock Camera Placement Principles
When planning a wireless hidden camera network, understanding mock camera placement is crucial for deterrence purposes. Mock cameras, or dummy cameras, are an effective way to deter potential criminals as they simulate the presence of actual surveillance equipment. Place them in strategic locations that offer broad coverage while maintaining realism—for instance, on walls, ceilings, or near windows and doors.
The goal is to make your property appear thoroughly monitored without actually revealing the location of your real cameras. Remember, mock camera placement for deterrence should be thoughtfully designed, matching the aesthetic of your space while effectively discouraging unwanted activities.
Choose Suitable Wireless Hidden Cameras
When setting up a wireless hidden camera network, selecting the right cameras is paramount. Choose models designed for your specific needs, whether it’s indoor or outdoor use, with features like motion detection and HD resolution. The goal isn’t just to capture footage but also to deter potential intruders, so select cameras with realistic mock placements in mind. Consider cameras that look like everyday objects, like smoke detectors or garden ornaments, to blend seamlessly into your environment without raising suspicion.
Plan Network Layout and Coverage Area
When planning a wireless hidden camera network, visualizing the layout and coverage area is crucial. Start by sketching or using software to map out the space you wish to monitor. Consider the dimensions and obstacles within the area, such as walls, furniture, and natural barriers. This step involves strategic mock camera placement for deterrence, ensuring that your cameras provide comprehensive but discreet surveillance.
Imagine potential viewpoints and blind spots where criminals might attempt to avoid detection. Place hidden cameras in these areas while also considering the need for overlapping coverage to prevent gaps in your network. A well-designed layout ensures every angle is captured, providing a robust security system tailored to your specific environment.
Configure Camera Connections and Settings
When setting up a wireless hidden camera network, one crucial step is configuring the camera connections and settings. Begin by identifying suitable locations for your cameras while considering factors like line of sight and potential interference from walls or other obstructions. Once ideal spots are chosen, connect each camera to its designated network node using high-quality Ethernet cables. Ensure secure connections by tightening all connectors firmly.
For optimal performance, fine-tune camera settings. Adjust resolution, frame rate, and brightness levels according to your specific monitoring needs. Additionally, configure motion detection parameters to minimize false alerts. Implement a robust mock camera placement strategy for deterrence—positioning decoys in visible areas can significantly reduce potential tampering or theft attempts.
Test and Optimize Network Performance for Deterrence
After setting up your wireless hidden camera network, it’s crucial to test and optimize network performance for maximum deterrence. Start by simulating real-world scenarios through mock camera placement. Position cameras at strategic locations around the area you want to monitor, ensuring comprehensive coverage while avoiding obvious spots where criminals might try to circumvent them. Observe the network’s stability, signal strength, and video feed quality during these simulations.
Use this feedback to fine-tune your setup. Adjust wireless channels, optimize router placement, and potentially upgrade hardware if necessary. The goal is to create a robust network that consistently delivers clear, uninterrupted footage. Regularly re-evaluate your mock camera placements and network settings to stay ahead of evolving security needs and technological advancements in the realm of surveillance equipment.
Setting up a wireless hidden camera network involves careful consideration of mock camera placement principles to achieve optimal deterrence. By strategically placing cameras based on identified threats and areas requiring surveillance, you can create an effective security system. Choosing the right wireless hidden cameras that suit your needs and planning a well-structured network layout are crucial steps. Once configured, test and optimize network performance to ensure seamless operation and maximum deterrent effect. Implement these steps for a robust security solution tailored to your requirements.